 QuantBot
QuantBot
QuantBot
발급받은 키를 봇 프로그램에 입력하고
본격적으로 100% 무인 자동 매매를 시작하는 마지막 단계입니다.
The final step: Enter the issued key into the program
and begin 100% automated trading.
홈페이지 메인 화면 하단에서 회원님의 성향에 맞는 'Model A' 또는 'Model B' 파일(ZIP)을 바탕화면에 다운로드합니다.
다운로드한 ZIP 파일에 마우스 우클릭하여 '압축 풀기'를 진행한 후, 폴더 안의 실행 파일(.exe)을 더블클릭하여 실행합니다.
Download the 'Model A' or 'Model B' file (ZIP) to your desktop from the bottom of the main homepage.
Right-click the ZIP file and select 'Extract All'. Then, double-click the executable (.exe) inside the folder to run it.
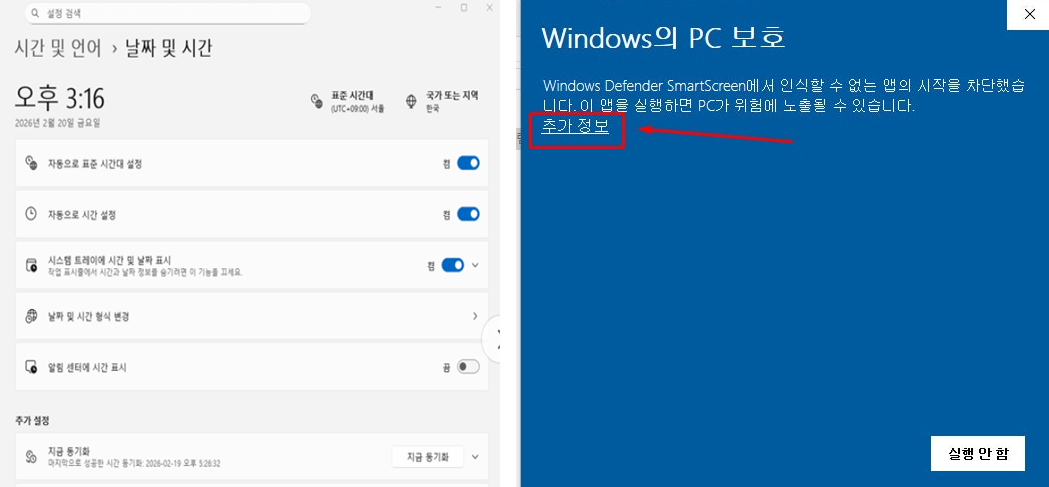
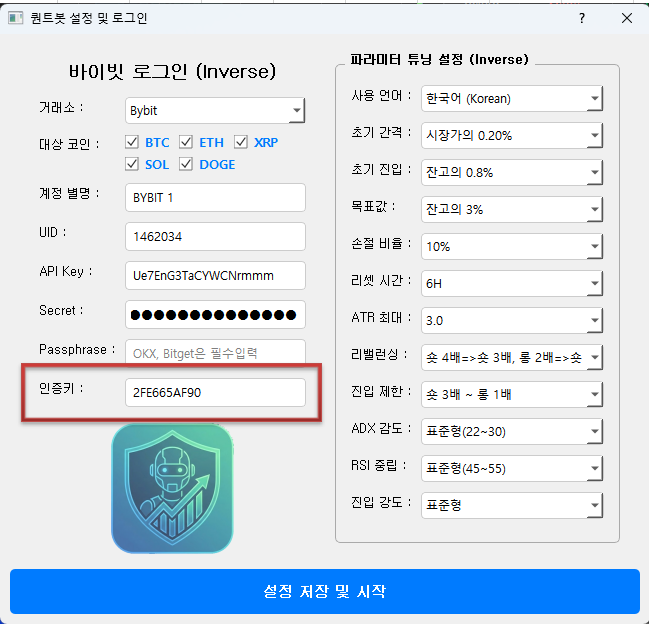
프로그램이 켜지면 최초 로그인 창이 나타납니다.
홈페이지에서 복사한 이벤트 무료 인증키 (1C26DC0119)와 본인의 거래소 고유 번호(UID)를 정확히 입력하고 확인을 누릅니다.
When the program starts, the initial login window appears.
Accurately enter the Free License Key (1C26DC0119) copied from the homepage and your exchange UID. Then click OK.
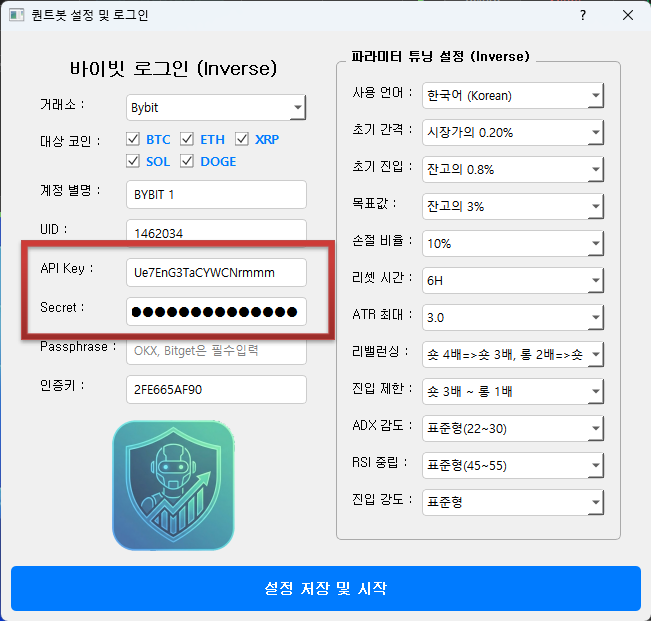
봇 메인 화면이 열리면 '설정(Settings)' 메뉴로 이동합니다.
STEP 2 단계에서 메모장에 안전하게 저장해 두었던 'API Key'와 'Secret Key'를 각각 복사하여 해당 칸에 오타나 띄어쓰기 없이 정확히 붙여넣고 저장합니다.
Once the main dashboard opens, go to the 'Settings' menu.
Copy and paste the 'API Key' and 'Secret Key' you securely saved from STEP 2 into their respective fields without any typos or spaces, then save.
모든 설정이 완료되고 메인 화면에서 [Start Bot] 버튼을 누르면 봇이 정상적으로 실행되며 아래와 같은 대시보드 화면이 표시됩니다.
이 화면에서 실시간 시장 데이터 분석 상태와 봇의 진입/청산 내역을 한눈에 모니터링할 수 있습니다. 이제 봇이 24시간 100% 무인 자동 매매를 수행합니다.
Once all settings are complete and you click [Start Bot], the bot will run normally and display the main dashboard as below.
From this screen, you can monitor real-time market data analysis and the bot's trading history at a glance. The bot will now execute 100% automated trading 24/7.
