 QuantBot
QuantBot
QuantBot
국내 거래소(업비트, 빗썸 등)에서 트래블룰을 통과하여
안전하게 해외 거래소로 자산을 이동하고 세팅하는 방법입니다.
Learn how to safely transfer assets from your local exchange
to your global exchange account in compliance with the Travel Rule.
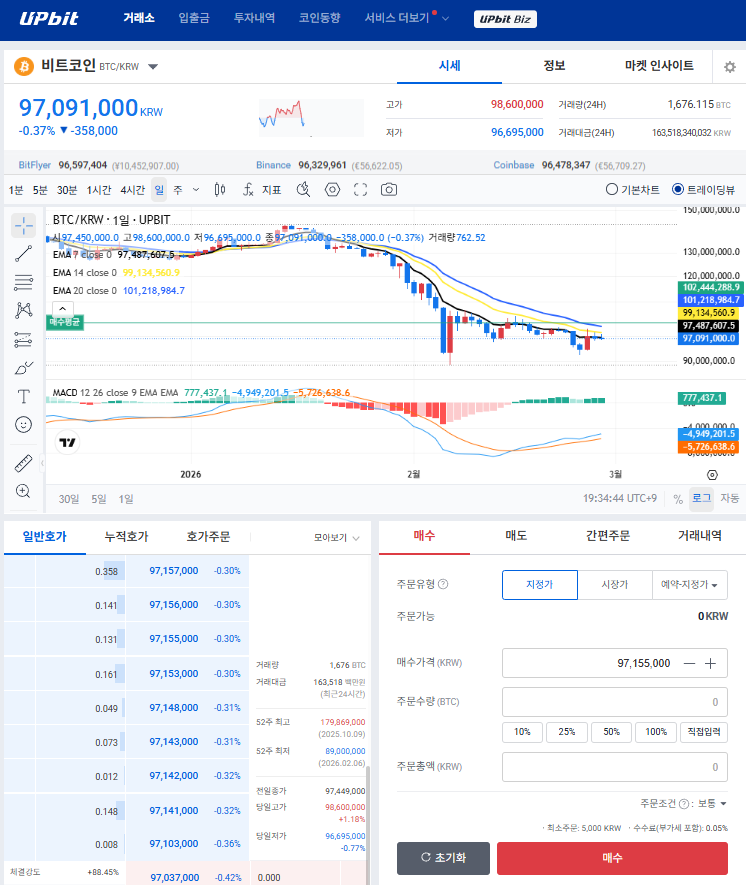
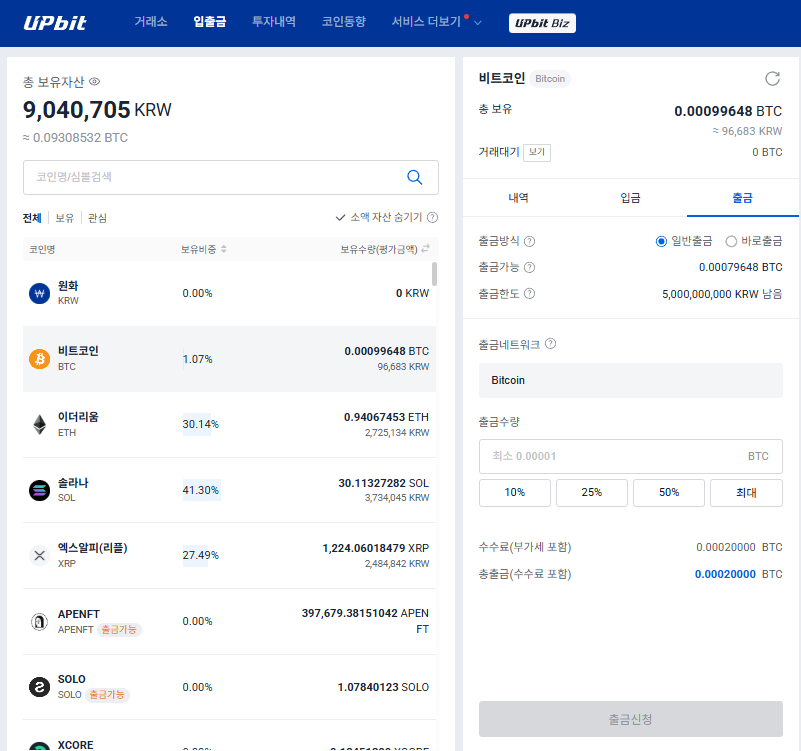
원화(KRW) 마켓에서 봇 구동 증거금으로 사용할 비트코인(BTC)을 매수합니다.💡 TIP: 첫 원화 입금 후 24시간 동안은 가상자산 출금이 지연될 수 있습니다.
Buy Bitcoin (BTC) on your local exchange using fiat currency.💡 TIP: Crypto withdrawals may be restricted for 24 hours after your first fiat deposit.
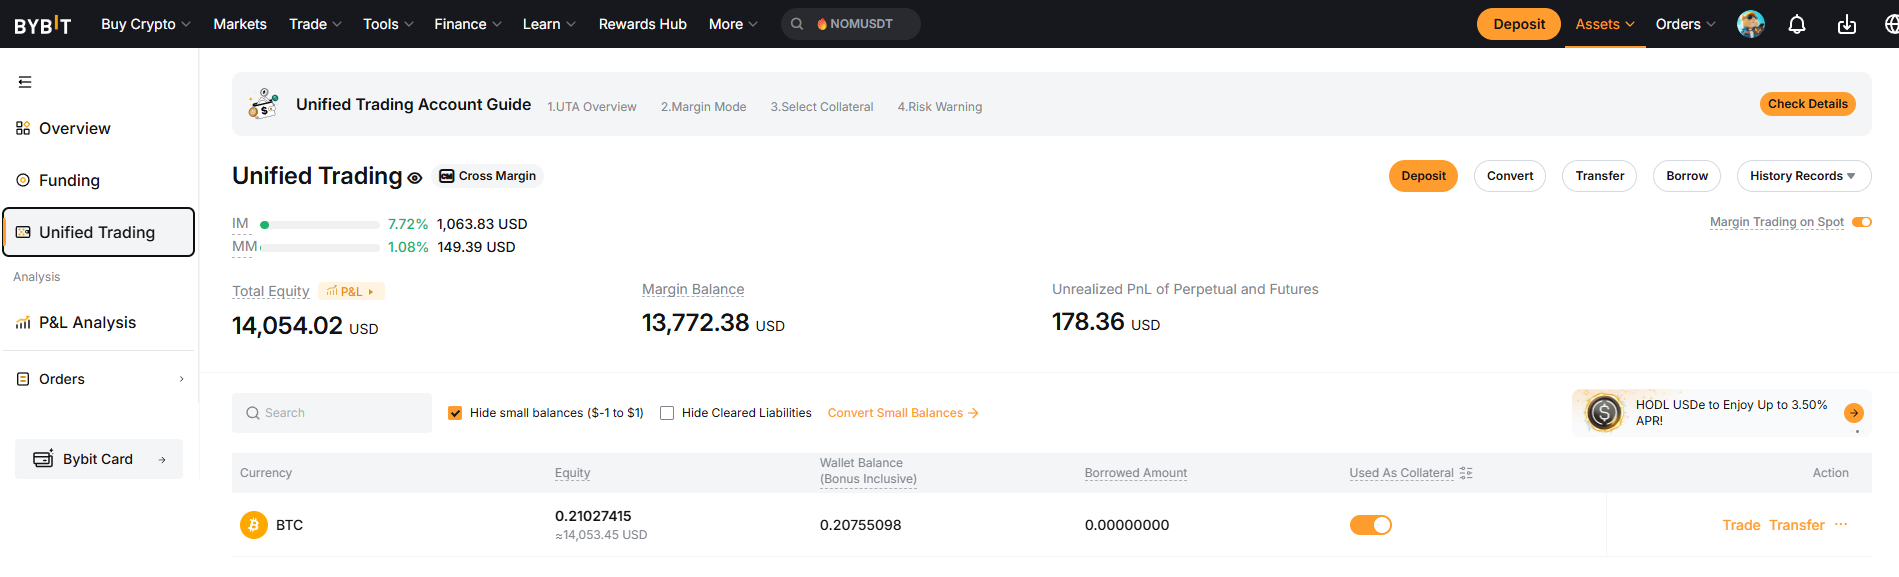
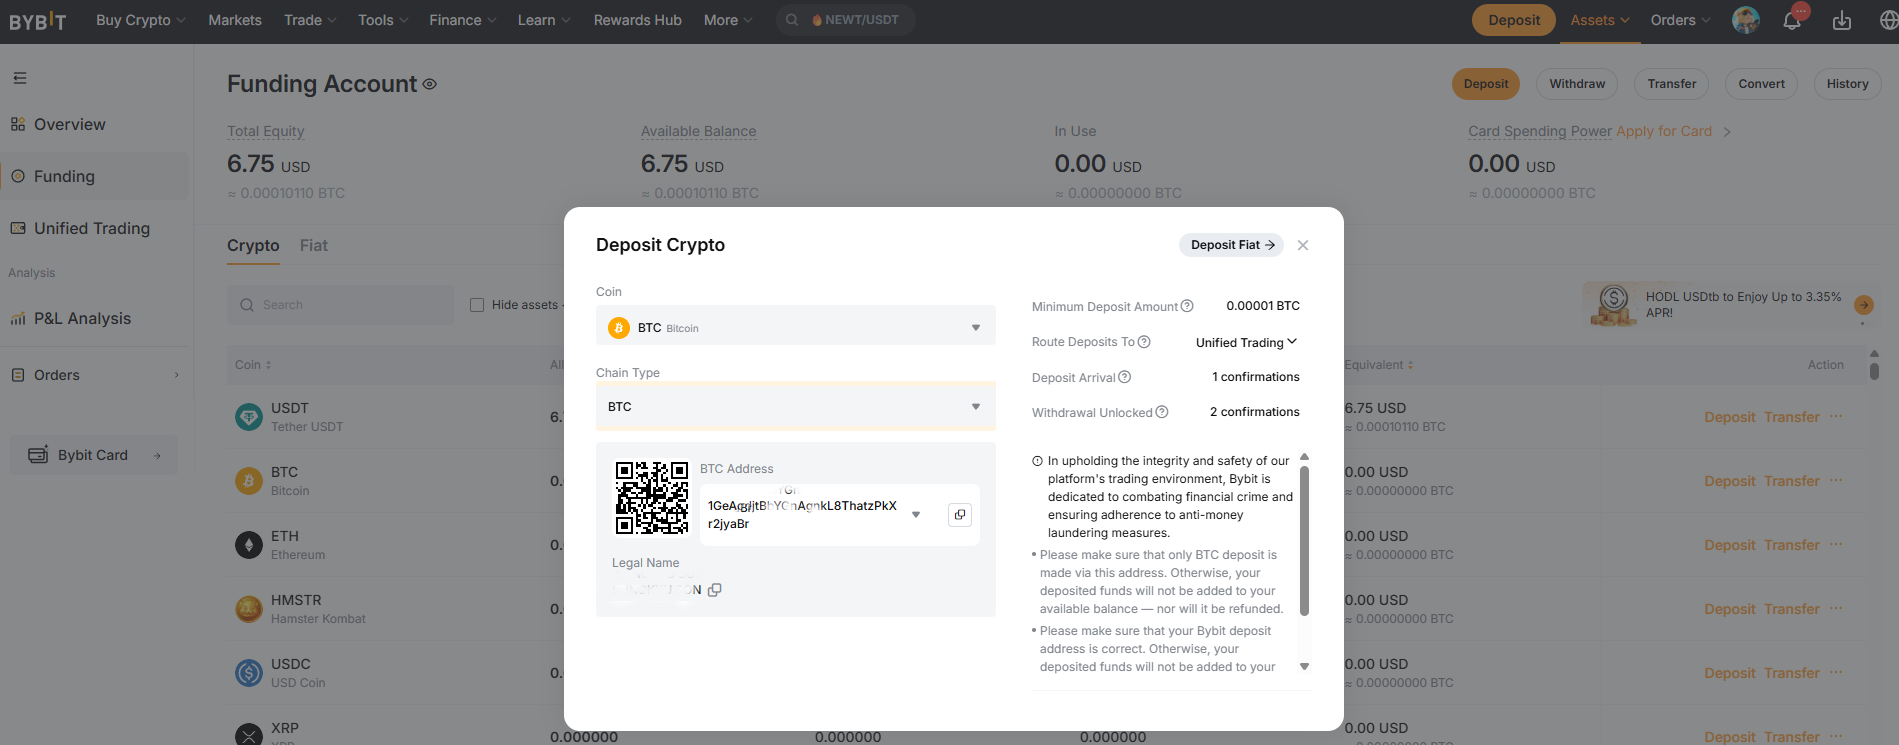
해외 거래소(예: 바이빗) 앱에서 Assets -> Deposit을 선택하고 BTC를 검색합니다.
네트워크를 BTC (Bitcoin)로 정확히 선택한 후, 생성된 입금 주소(Deposit Address)를 복사합니다.🚨 중요: 네트워크를 반드시 'BTC'로 일치시켜야 자산 유실을 방지할 수 있습니다! (비트코인은 별도의 데스티네이션 태그가 필요 없습니다.)
In your global exchange app (e.g., Bybit), go to Assets -> Deposit and search for BTC.
Select the strictly BTC (Bitcoin) network and copy your Deposit Address.🚨 IMPORTANT: Ensure the network is set to 'BTC' to avoid permanent loss of funds!
업비트 입출금 탭에서 비트코인(BTC) 출금하기를 누릅니다. 앞서 복사한 해외 거래소의 BTC 입금 주소를 붙여넣기 하고 전송합니다.
약 10~30분 뒤 해외 거래소로 자산이 도착하면, Model A 사용자는 BTC를 그대로 증거금으로 사용하고, Model B 사용자는 BTC를 매도하여 USDT(테더)로 교환하여 사용합니다.
Go to the Withdraw tab on Upbit for BTC. Paste the Deposit Address you copied earlier and proceed with the transfer.
Once the funds arrive (usually 10-30 mins), keep it as BTC for Model A, or sell it to convert into USDT (Tether) for Model B.
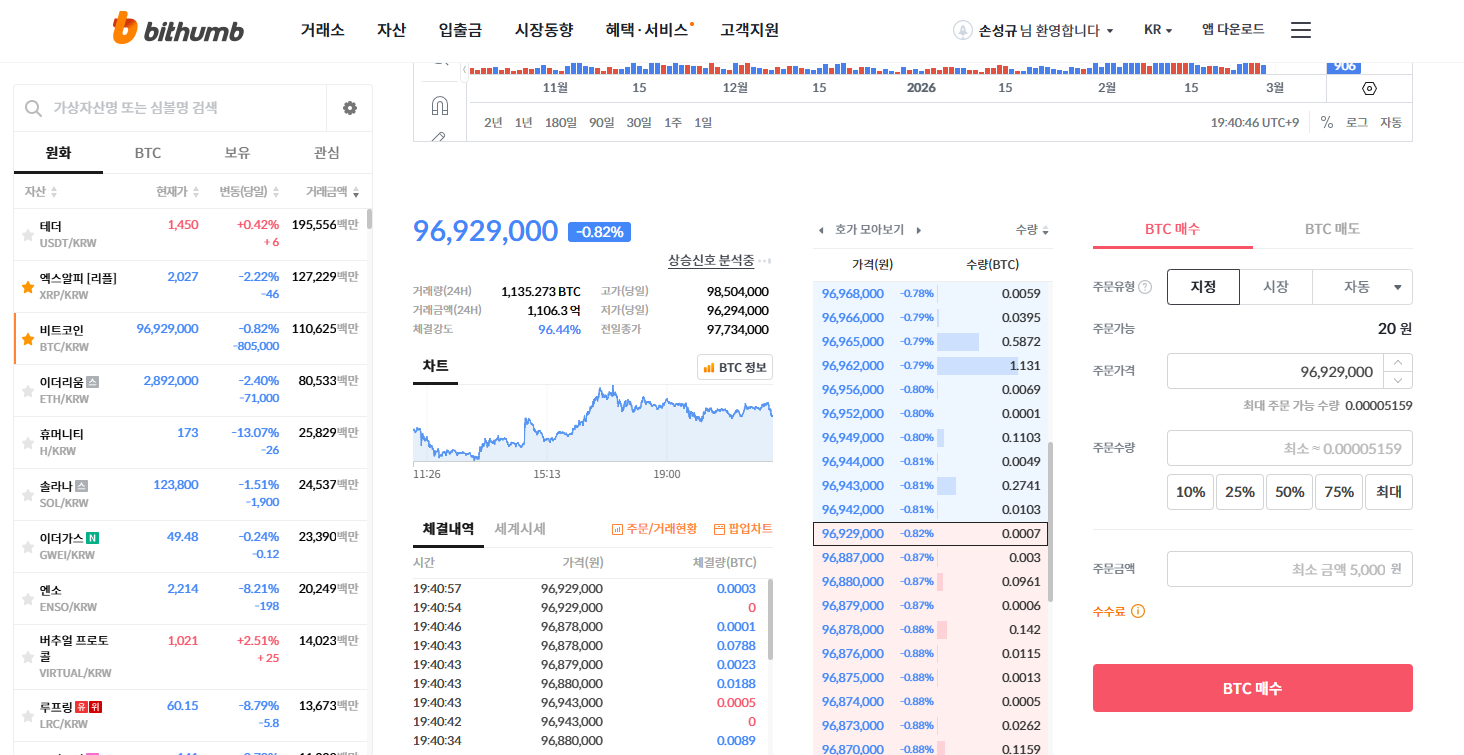
원화(KRW) 마켓에서 봇 구동 증거금으로 사용할 비트코인(BTC)을 매수합니다.💡 TIP: 첫 원화 입금 후 24시간 동안은 가상자산 출금이 지연될 수 있습니다.
Buy Bitcoin (BTC) on your local exchange using fiat currency.💡 TIP: Crypto withdrawals may be restricted for 24 hours after your first fiat deposit.
해외 거래소에서 BTC 입금 주소를 확인합니다. 빗썸은 타 거래소 송금 시 사전에 '출금 주소 등록(화이트리스트)' 과정이 필요할 수 있습니다.
해외 거래소의 본인 프로필(KYC 정보)과 입금 주소 화면을 캡처하여 빗썸 고객센터에 등록을 완료해 주세요.
Check your BTC Deposit Address on the global exchange. Bithumb may require you to Whitelist your withdrawal address first.
Capture your profile screen (KYC info) and deposit address to submit to Bithumb.
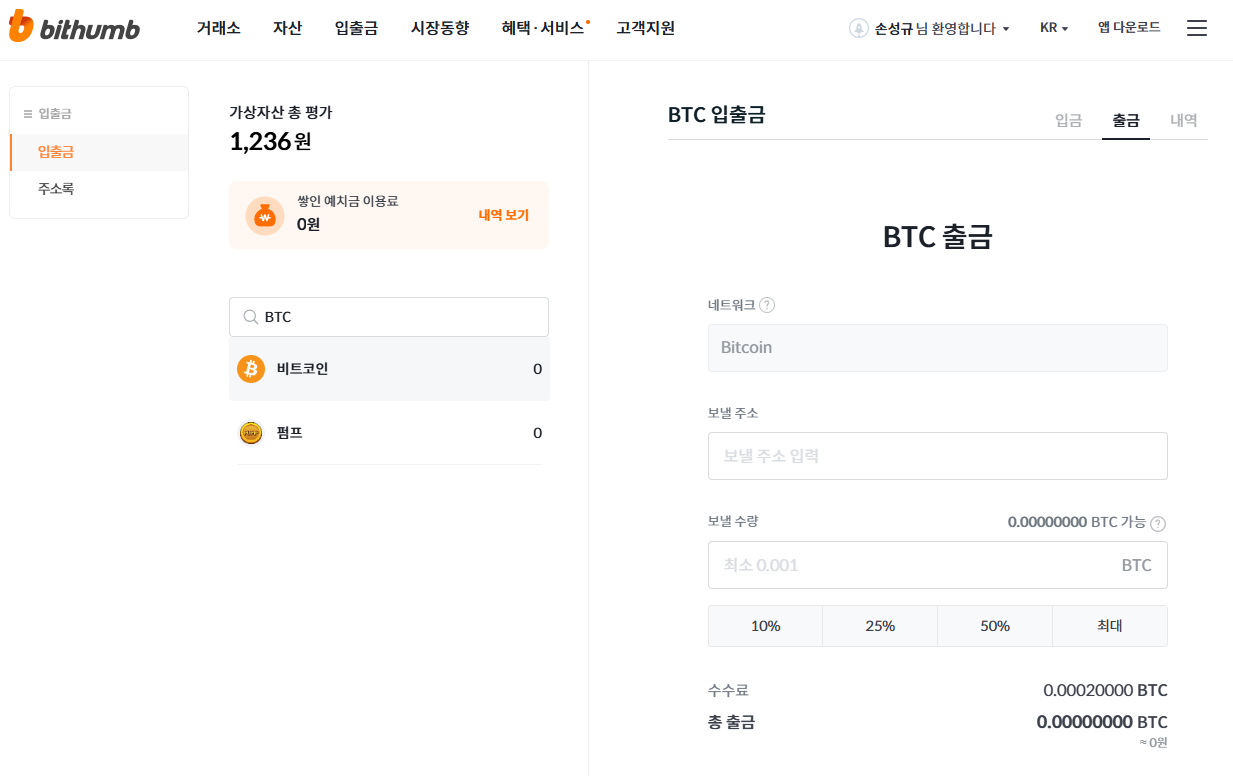
빗썸 입출금 메뉴에서 비트코인(BTC) 출금을 진행합니다. 등록된 BTC 입금 주소를 선택 하고 전송합니다.
해외 거래소로 자산이 도착하면, Model A 사용자는 BTC를 그대로 유지하고, Model B 사용자는 USDT(테더)로 교환하여 봇 세팅을 준비합니다.
Go to the Withdraw menu on Bithumb for BTC. Select the registered Deposit Address and proceed.
Once funds arrive, keep it as BTC for Model A, or convert into USDT (Tether) for Model B.